
Today I’ll be taking you through the making of a butterfly straitjacket in a heavy black patent leather. The original pattern is from back in 2003, but I’ve made a couple of modifications to the collar and the arm pockets. In the picture below are the patterns for the back panel, front panel, arm pocket sides and the old and new collar.  The leather I’m working with is a heavy black patent cowhide, which should look really sexy and be nice and restrictive. The heavier the weight of the leather, the stiffer and more restrictive it is for the wearer. Of course, you have to find a balance, as the stiffest possible leather would be uncomfortable, and wouldn’t conform to the wearer. If you use a leather that is too light, it won’t feel restrictive and could be easily ripped. This patent leather offers a happy medium. Or, let’s say medium-heavy. =0)
 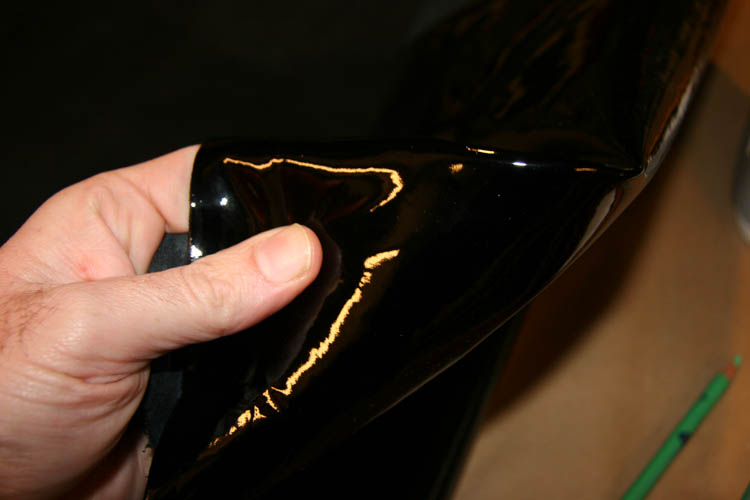 Now it’s time to trace out the pattern for the sides of the arm pockets.
  I have marked the pattern so I can orient the pieces correctly when assembling. There is a contour to this piece, so the arm pockets taper at the wrist and get wider at the elbow. I also need to flip the pattern, as it is not symmetrical.
  Here I have all the pieces laid out; arm pockets, front panels, rear panels and collar.
 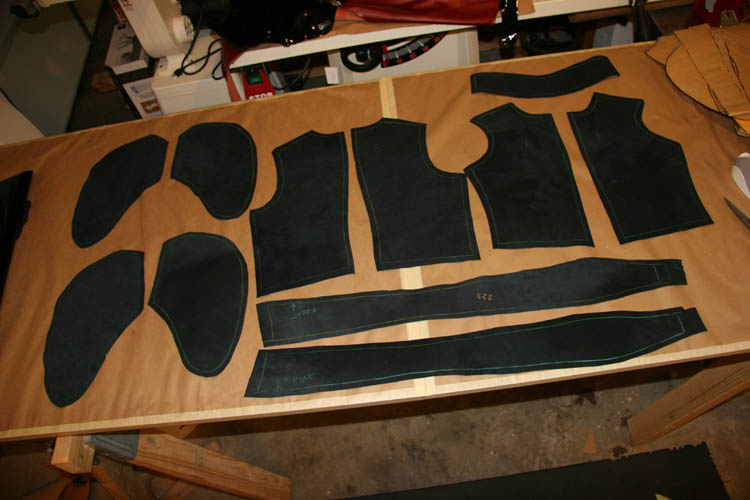 Time to get the clips out…
  I start by assembling the arm pockets. Using the shaped front panel as a guide, I clip the side strip along the entire edge. I make small cuts to allow the strip to follow the contour of the arm pocket.
 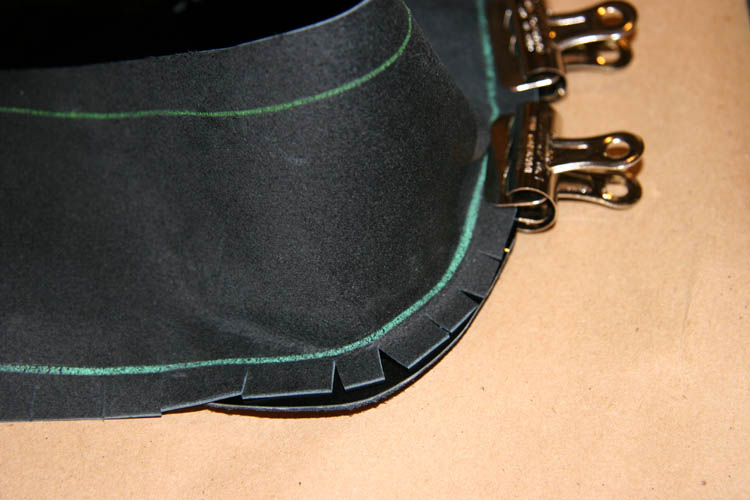 I try and stop just short of the sew line, so I won’t end up with the slits visible on the outside of the finished piece.
  Yes, I use a lot of clips!! (If you ever need a Christmas present for a leather crafter, these things are great. You can never have too many.)
  I also clip the front seam together for sewing:
 Here we have a finished seam:
  The next step is to attach the back panel to the arm pockets. More clips.
  Once these are sewn, it’s on to the first glue-ups. To glue the seam inside the arm pockets I have to rough-up the shiny surface of the patent leather. Otherwise the glue will not stick, and the seam will not be held flat. I used a coarse sandpaper to rough up the surface.
  I also glue down the seam allowance on the front panel at this point.
  Here I’m waiting for the glue on the arm pockets to set up.
  Once the glue is ready, I can flatten the seam.
  It’s hard to see in the photo, but here’s the front seam flattened from the outside.
  Next up, I’ll sew the rear panels to the front panel at the shoulders and side. Once those seams are sewn, I can glue down and flatten the seam allowance as well.
  The next operation involves setting in the arm pockets. At this stage I want to turn the arm pocket right-side out.
 The arm pocket is placed inside the jacket body, right side out.
  I align the center top of the arm pocket to the shoulder seam, and clip in place. This is one time where I wish I had a cylinder-head sewing machine instead of a flat-bed. It would make this type of thing much easier.
  Here is the jacket with arm pockets attached:
  Now to attach the collar. The center mark of the collar aligns on the center seam of the jacket body.
  Working from the center out, I’ll attach clips along the way.
  Now we have the collar attached!
  It’s starting to look really great at this point.
  At this point, the collar is unfinished. I’ll turn the seam and sew it down.
  I want to check the rear opening at this point, to make sure the collar is even on both sides. I want the height of the collar to align properly, and now is the time to make any necessary adjustments.
  That looks just right!
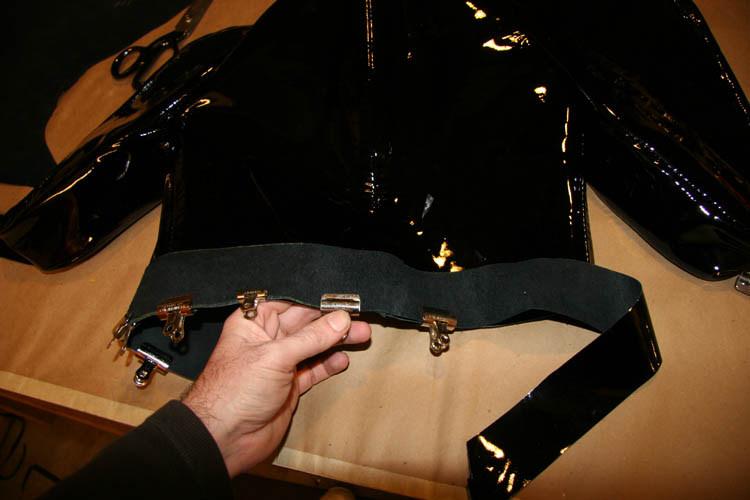
  OK, at this stage, we have all of our seams glued down.
  Just a couple more things to do to wrap this one up.
  I need to cut a couple of 2-inch strips: one for the jacket’s bottom edge, and one for the tongue that will protect the skin from the zipper.
  For the bottom edge, I’m doing a rolled edge. I’ll attach the good side of the patent to the good side of the jacket, aligning both edges and holding with clips.

 Once this is sewn, I trim the strip to align with the edge of the jacket opening.
  Then I run glue along the entire bottom edge, both on the strip and the inside of the jacket.
  The strip is folded up, and top-stitched along the edge of the rolled seam.
  I love the polished look this gives the edge. Plus, it reinforces and strengthens the edge as well.
 Now it’s time to set the zipper. I use a YKK #5 nylon coil separating zipper, and will use masking tape to hold it in place while sewing.
 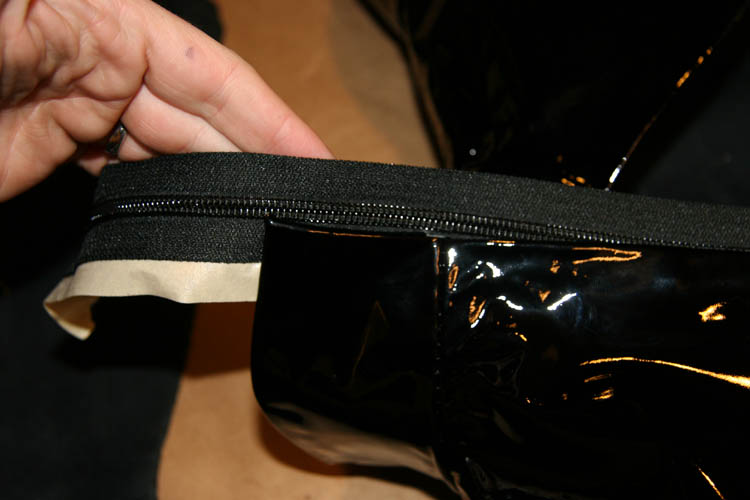 The most important part is to align the zipper properly at the bottom of the opening.
  Here’s our zipper ready for sewing (well, the first half, anyway…).
 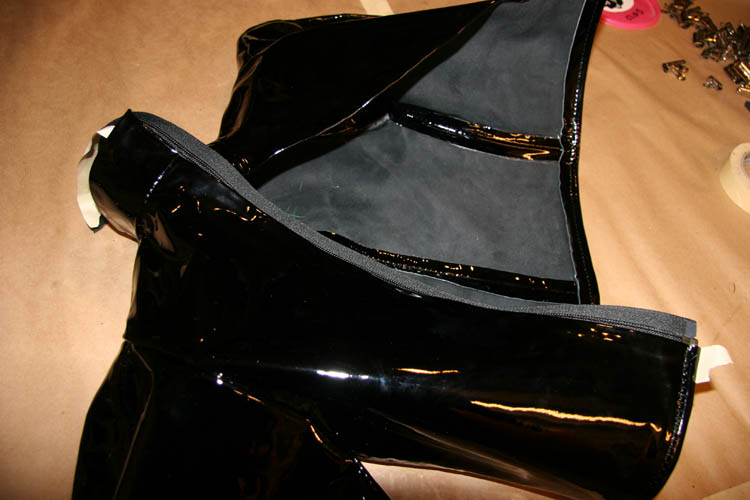 And after.
  Now, using a combination of tape and clips, I’ll hold the other side of the zipper in place for sewing. Patent leather and slick vinyls can offer a particular challenge when sewing, as the slick surface can make feeding the material through difficult. I want to make sure that the other half of the zipper doesn’t go anywhere, as if if moves it won’t align properly.
  OK, now we have the second half of the zipper attached. I want to trim my zipper to length, but before I do, I need to make sure the pull won’t come off the end of the zipper chain.
  I’ll use heavy waxed thread to make a zipper stop at just the right length. Just a couple of turns on each side will be enough the keep the pull from going too far. Then I trim the zipper chain and singe the edge with a lit match to keep it from unraveling.
  Finally, we come to the last operation: the tongue. I want to run this along the zipper using a second line of stitches. As with the zipper, I’ll use the masking tape to hold the tongue in position while sewing.
 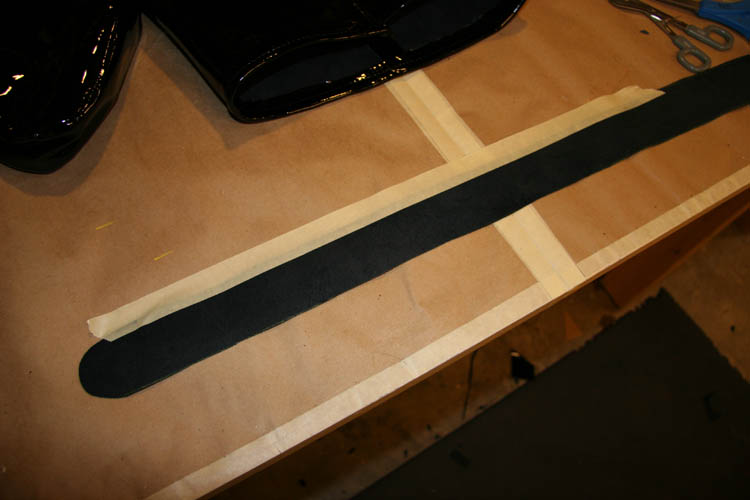 And there we have it: tongue complete!
  Jacket complete! Front view:
  And back view:
  And on it just looks amazing. I’ll have to take better pictures, as it’s rather hard to shoot.
That’s about it for this project. I look forward to making more projects in patent leather in the coming year. I could see a full F-suit or sleepsack in heavy patent, can’t you? Thanks for visiting, and see you next time…
Month: December 2010
A kinky Merry Christmas!

Season’s Greetings to all my blog readers and fellow kinky crafters out there in internet-land. I wish you all health, wealth and happiness in the coming year. I’m looking forward to working on a whole bundle of exciting new projects, and of course sharing them with you every step of the way. Take care, play safe, and have a very Merry Christmas!
Sleepsack Design Sketches
Fetish leathercraft is my hobby, my passion – a bit of an obsession for me even. I have ideas about bondage gear all the time – new concepts, materials, construction details. I’m inspired by everything around me, from kinky things online to everyday objects: handbags, boots, jackets.
Part of the reason I wanted to start a blog was to have a way to share ideas with other perverts, rather than keeping them all in my head or stuck in a sketchbook that no one will ever see. It can be kind of lonely when you have a great kinky idea and wish you had someone to share it with. Someone who would really appreciate it…
So, I’m posting some designs from an old journal showing a variety of sleepsack concepts below. I hope to make each and every version, eventually.
The segmented designs below are inspired by puffy jackets, sleeping bags, and a leather jacket made years ago by Gianni Versace. I always thought there was something kinky about sleeping bags, and a leather version with attached hood would be the ultimate for a certain type of bondage enthusiast. The practical downside (Ouch, sorry) would be that it would get really hot in there, really quick – with 2 layers of leather plus the insulating padding. It would only be practical in a location where it was pretty cold. Hmm… maybe you COULD take this one camping. The overall gentle pressure provided by the fill would create a really intense sensation. Next up, I have a couple of ideas that incorporate straps topstitched over the sleepsack for additional reinforcement as well as a color contrast. The Asylum version I could see with a distressed brown leather on top of a creme or gray color, with lots of rivets – almost a steampunk look. For the X-suit, it could be black and white or some other high-contrast color scheme. The hood reminds me of Racer-X from the speed racer series. Very Matrix-y.
 A further development of the puffy look might be the quilted look shown below. I have seen handbags and boots from Chanel that incorporate the quilted leather, and I think it would look incredibly tough on a full sleepsack. Can’t you imagine a shiny black exterior, with a full red or pink interior? It would be super cool. The other concept shows a high-contrast series of straps sewn over the sack from top to bottom. These would create contour lines that define the shape inside, and would add to the overall restriction for the occupant. Colors could be determined, but the overall look was inspired by a tape-mummification image I saw a while ago.
 Small sketches like these help me figure out the aesthetics of a design before I start making the actual piece. Details like how far apart I want the lacing panels to be when the sleepsack is on can all be worked out at this stage. In a lot of fetish art by Jim or Eric Stanton, they will show the laces pulled completely together, which is a great look. From a practical side, I like to allow a little bit of space, so if needed the laces can be pulled even tighter. This helps combat the stretch of the leather as well. Even if the piece stretches, you want to make sure you can pull those laces tight.
 I could see a monochrome or contrasting color scheme on both designs below. One could really emphasize the openings at the breast with a contrasting color, and if the colors were bright enough it could even take on a super-hero type look. Although I usually try and minimize seams, which could be seen as potential points of weakness, you could use the seams in a decorative, intentional way, as with the sack on the right below. There could even be piping at the seam in a contrasting color, simulating the welds as on a piece of sculpture by Antony Gormley.
 That’s it for now… More sketches to come!
