Will this even work? I guess we’ll find out soon enough…
How To: Make a Boot Binder Sleepsack – PART III

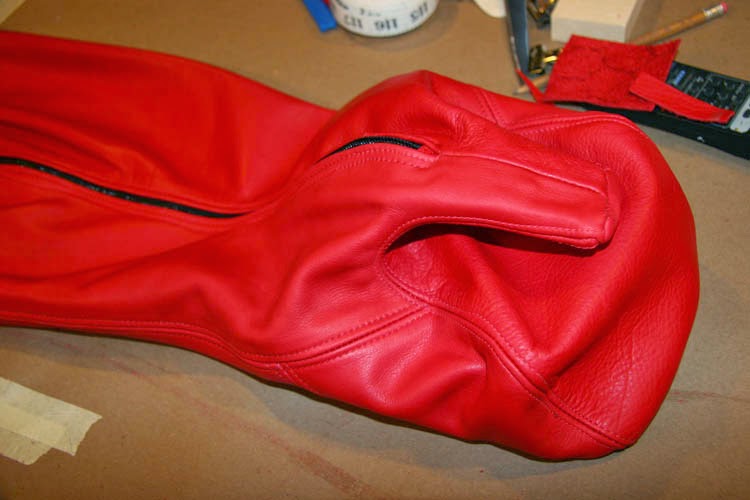
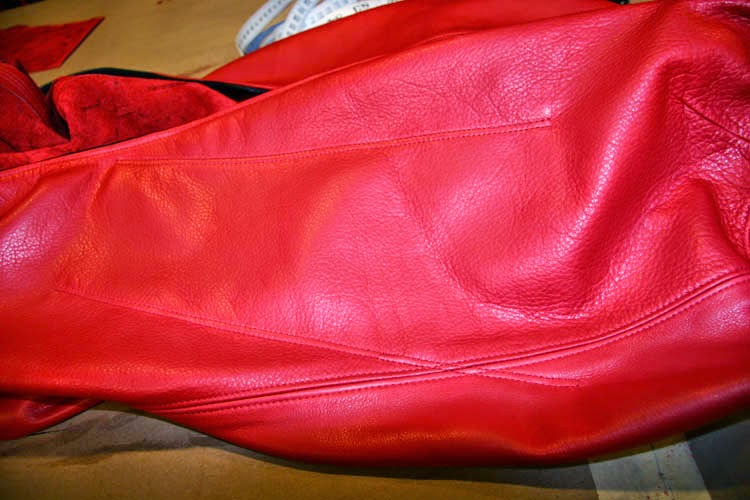
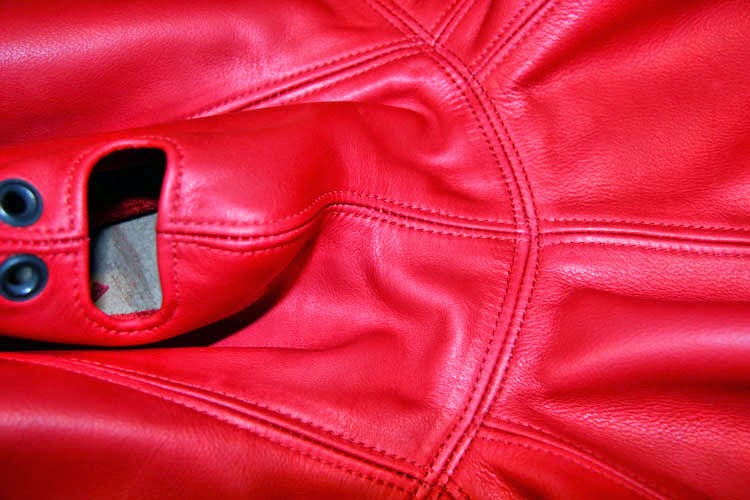
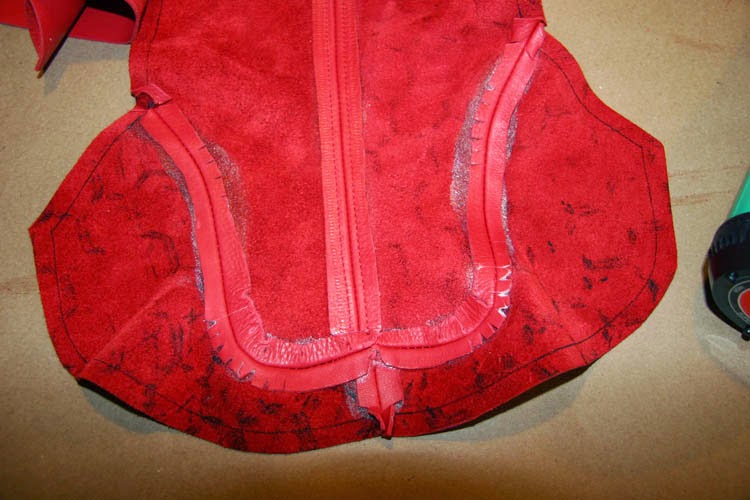
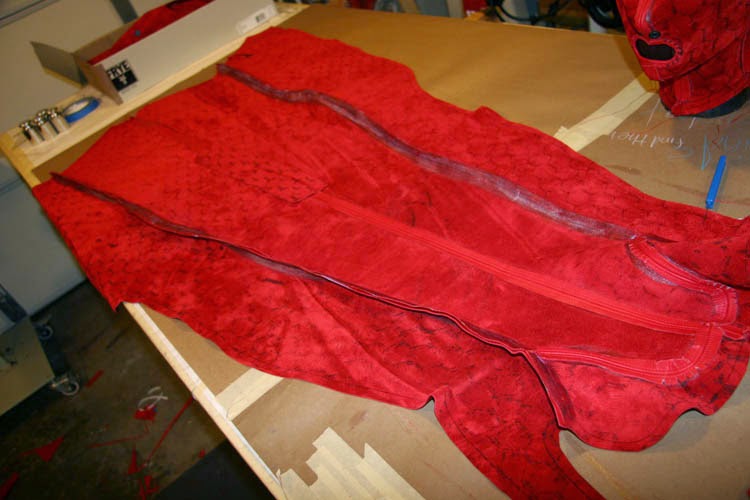
Time to finish up the sack. First we need to fine-tune the connection between the hood and the body to get a smooth line. You can see in the image below, the hood seam needs to come in about 1/4 inch to meet the body seam. I usually try to have a little extra here, as it’s better to trim down to size than to come up short…

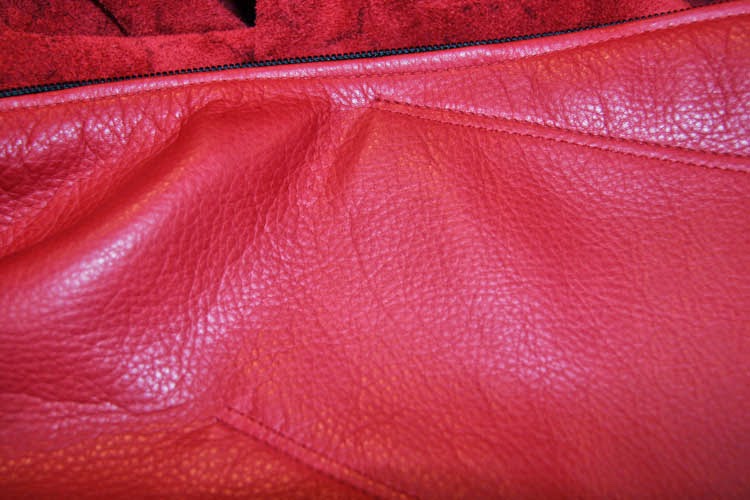
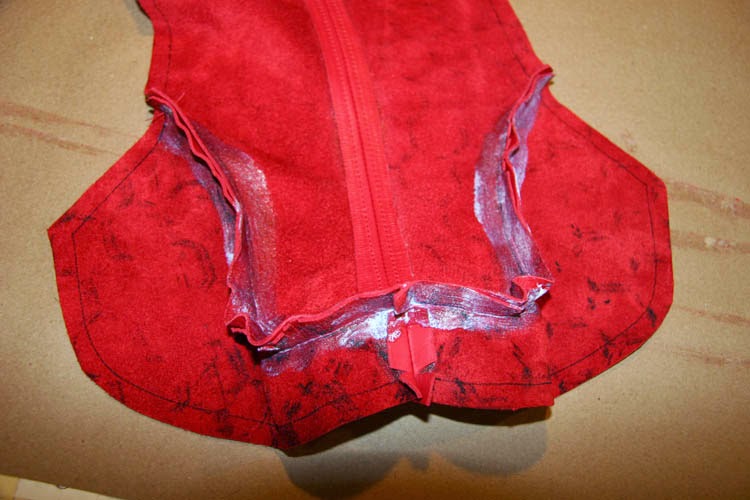
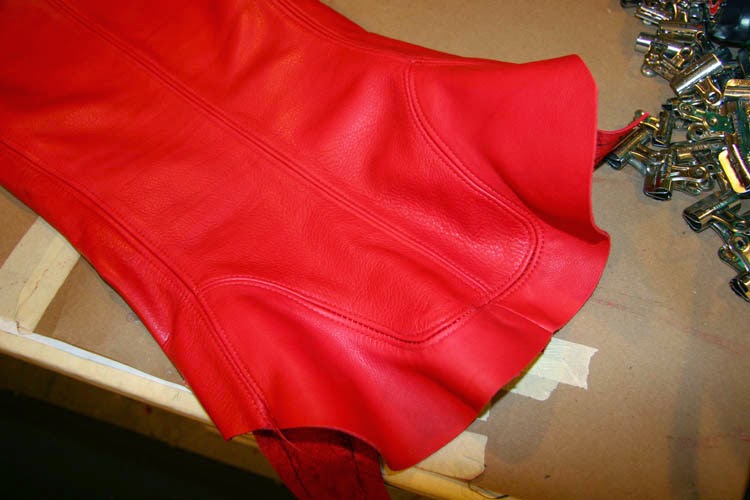
Once the lines are drawn and seam allowances cut, the entire rear opening is glued and turned in along the edge.

From the bottom of the heel pocket:

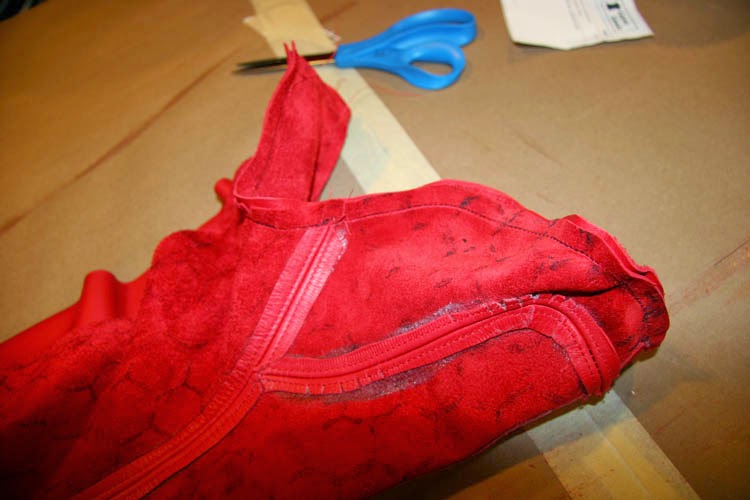
To the top of the hood:

Glue is applied, allowed to set up, and the whole seam is turned and flattened with a mallet.


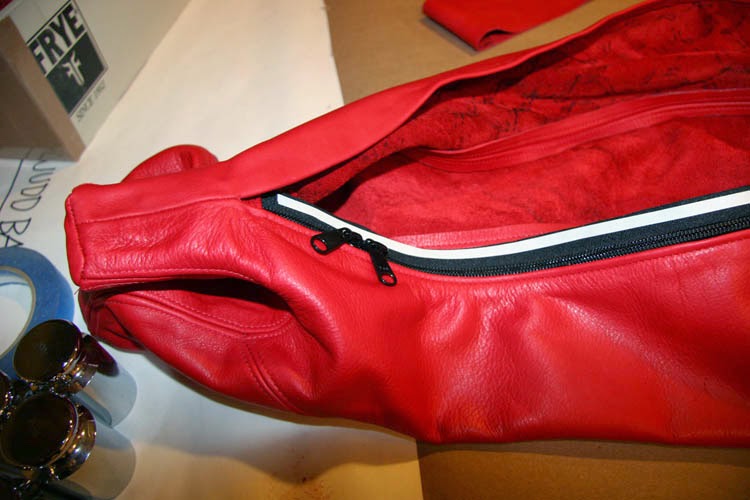
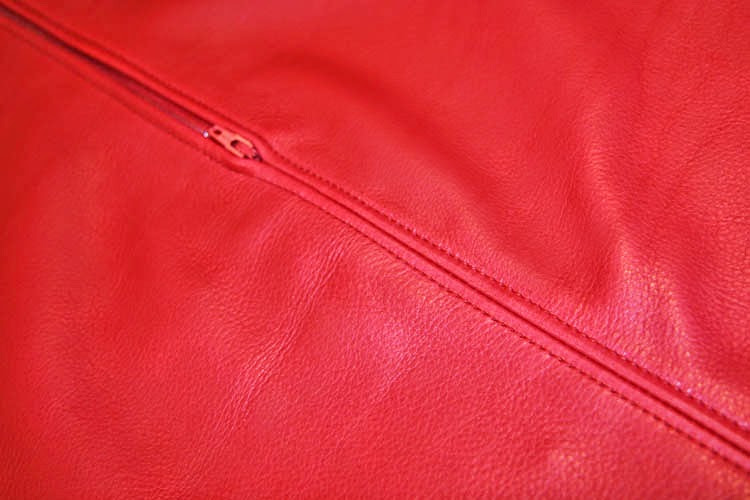
Lately I’ve been sewing in the first half of the zipper without any tape or clips holding it in place. I just cut the zipper a bit oversized, separate it, and sew in the first half freehand.
I also created a zipper stop on this piece, which allows me to have a neater finish (and less bulk) at the beginning and end of the zipper opening.

I cut small rectangles of leather, and skived them down to minimize bulk and create a clean turned edge.

These are sewn to the end of the zipper.

And held in place with double-sided tape.

I don’t actually sew these to the zipper until it’s partially sewn in. That way I can position it precisely based on what is needed.

For the second side of the zipper, I’m using double-sided tape to hold the it in position.
This allows me to close up the entire second side (kind of a dry-fit), and make sure the leather on both sides of is properly aligned.

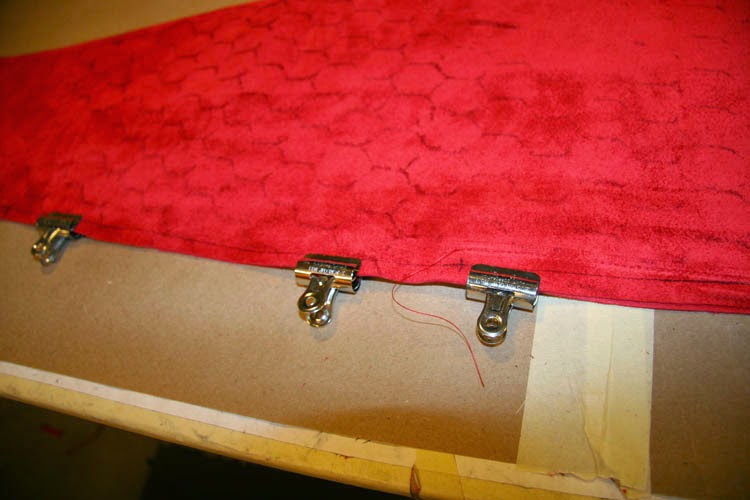
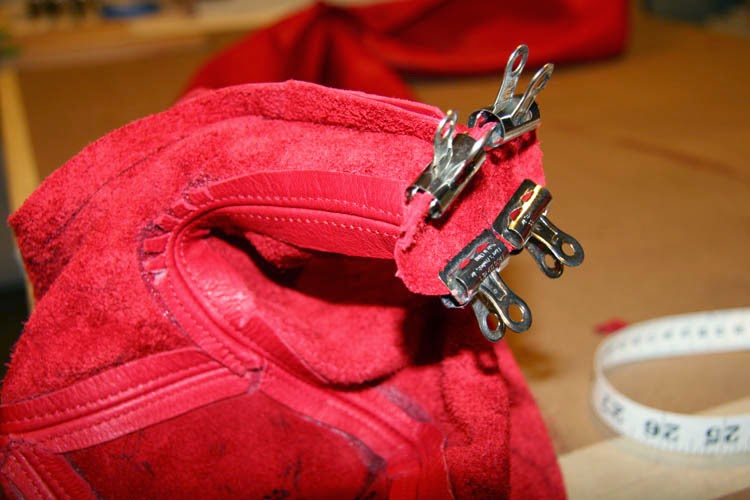
Once I’m happy with the placement of the 2nd side of the zipper, I carefully unzip and use binder clips to hold it in place while sewing. The clips provide additional insurance that the zipper won’t move out of position while being fed through the sewing machine.

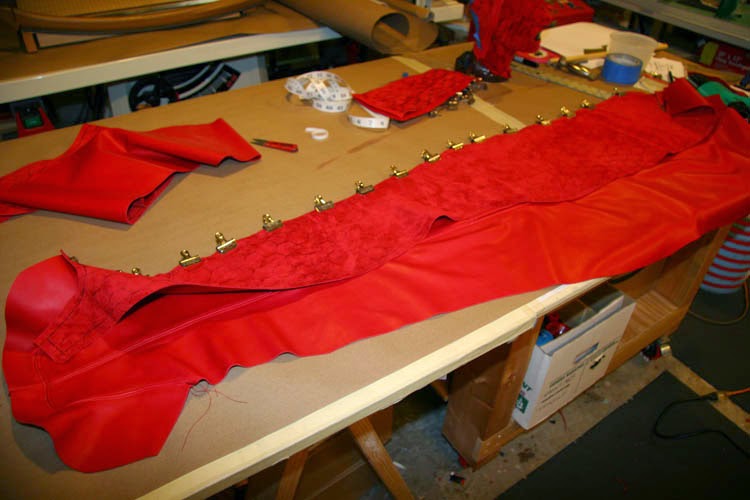
It seems to work pretty well for me so far… Next, long strips are cut for the rear tongue.

The tongue is also held in place with double-sided tape, and topstitched in place.

This sack has two additional sliders, so it can be opened anywhere you like along the rear.

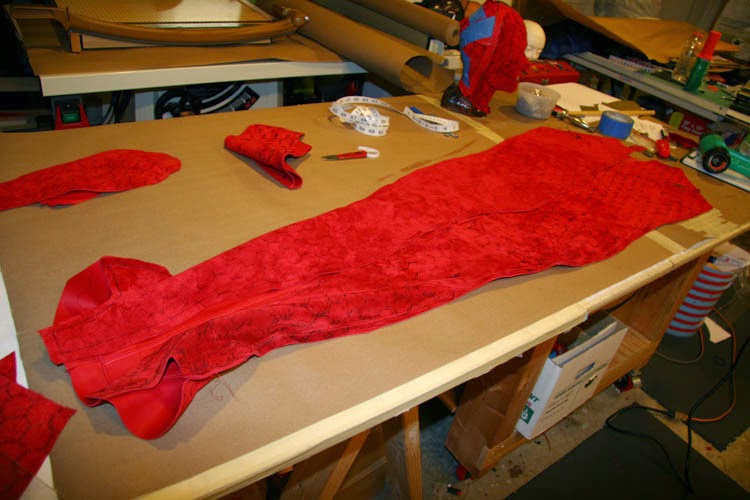
Next up: two internal sleeves with turned and sewn edges.
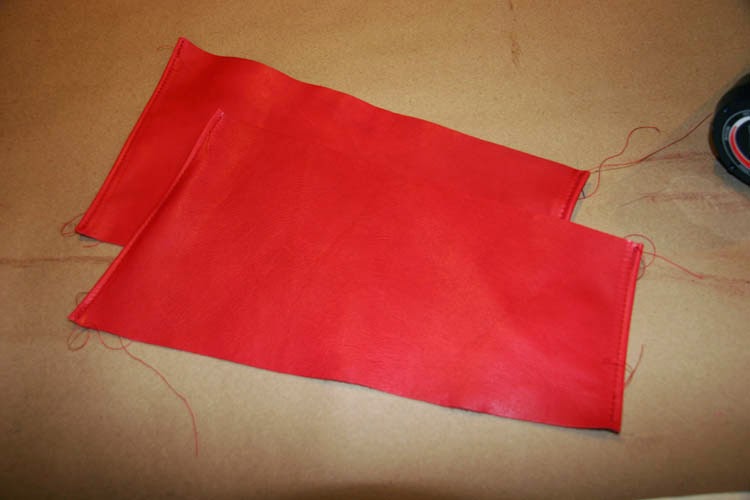

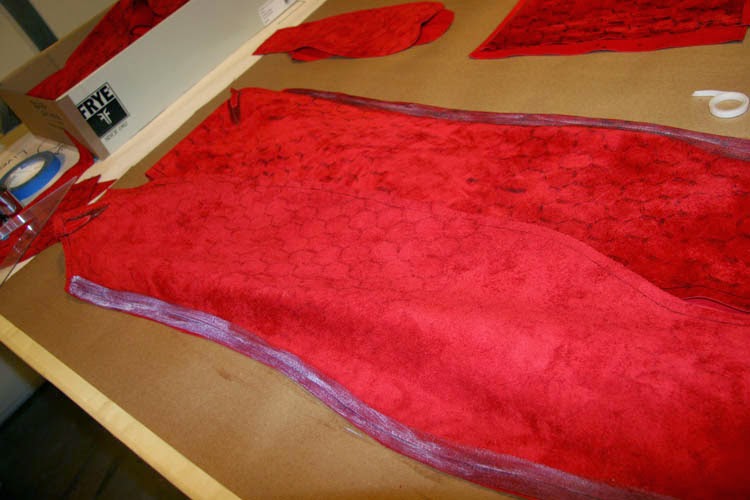
These are positioned according to the pattern and sewn in place: first from the inside following the line.

And second: topstitched from the outside, using your first line of stitching as a guide.
Instead of backstitching, I just cut the threads long and tied them from the inside. Gives a neater look…
And finally, this sleepsack features nipple access. Circle shapes cut out and placed in just the right location…
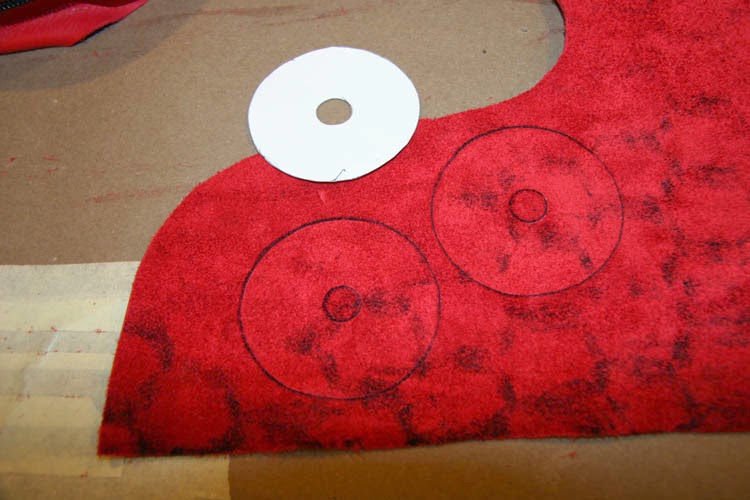
These are held in place with double-sided tape, and topstitched. Very, very carefully – it’s about as front-and-center as any stitching you’ll do. Highly visible.

So, that brings to a close our sleepsack project.

Hopefully I’ve given some ideas you may use for your own projects.

The ability to make things to your own specifications, and to fine-tune the design to meet your requirements is what custom leather crafting is all about.

How To: Make a Boot Binder Sleepsack – PART II

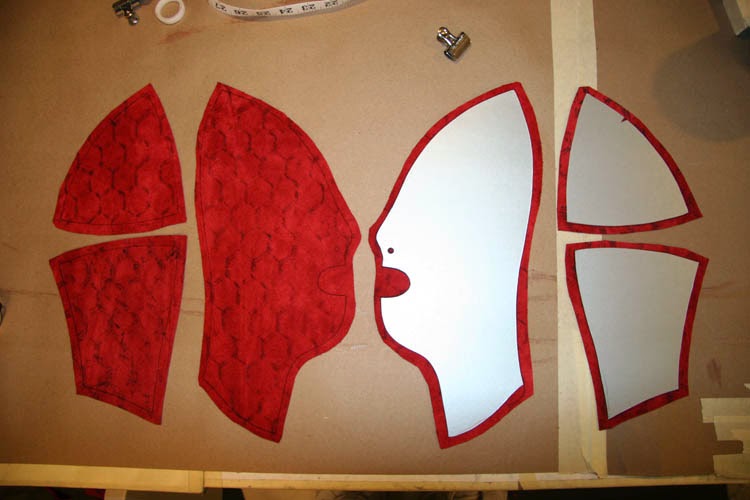
In this post we’ll make the hood and attach it to the body of the sack. We begin with our six hood parts: L+R front panels, L+R rear top and L+R rear bottom panels.
The fronts are clipped together for sewing, along with the top and bottom halves for the rear panels.
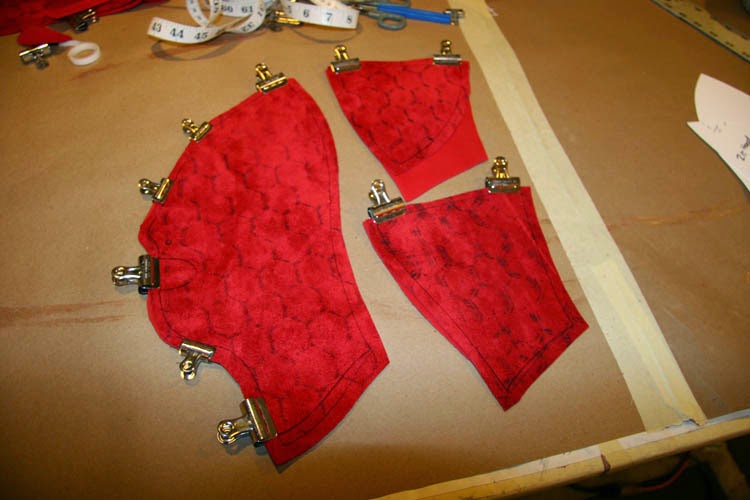
This center seam in the rear panel really helps make the hood take on the spherical shape of the back of the head, especially with a slightly heavier leather like this lamb-tan. The two rear panels are then sewn together an inch or so at the top.

These 3 seams get glued and flattened.
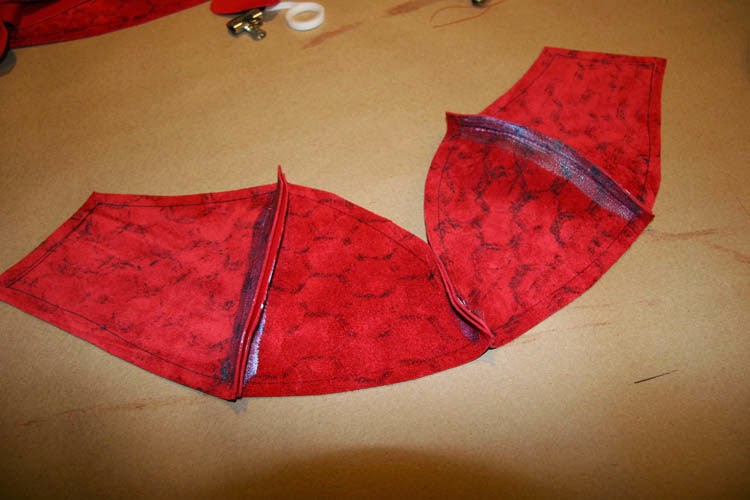
The front panel is stitched slowly and carefully, being sure to leave the mouth area open (at least on this version). This is the point where you want to do whatever variations you have in mind for the front of the hood: before you sew on the back.

I use the head form to start molding and shaping the hood. To me it’s the most important part, and it has to fit perfectly.
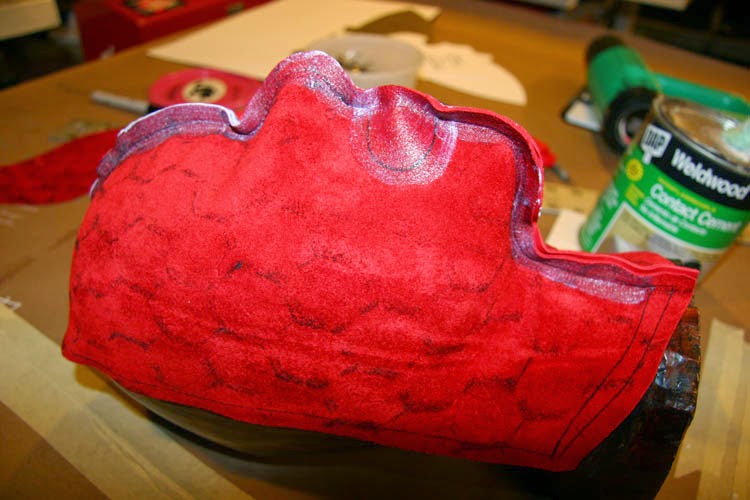
Working with the fitting hammer, scissors and razors, the seam is flattened and the leather around the mouth opening is folded back. You are sculpting the leather, almost like clay.
Take your time to work it, and get a nice smooth opening.

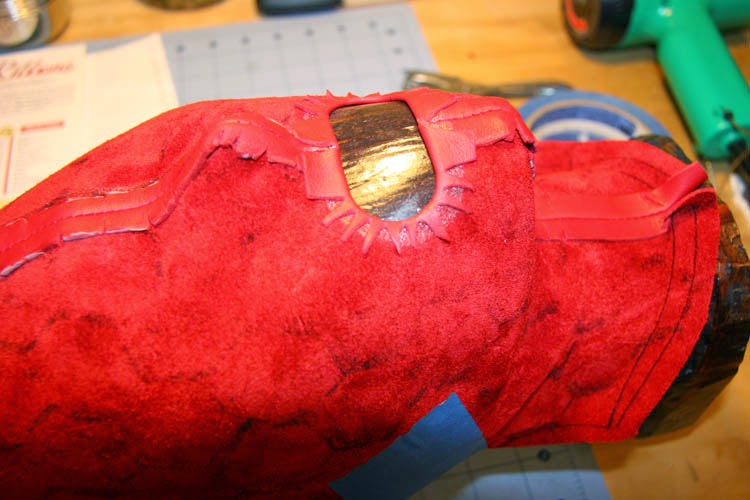
Trim, undercut and skive to get the seam as flat and smooth as possible.
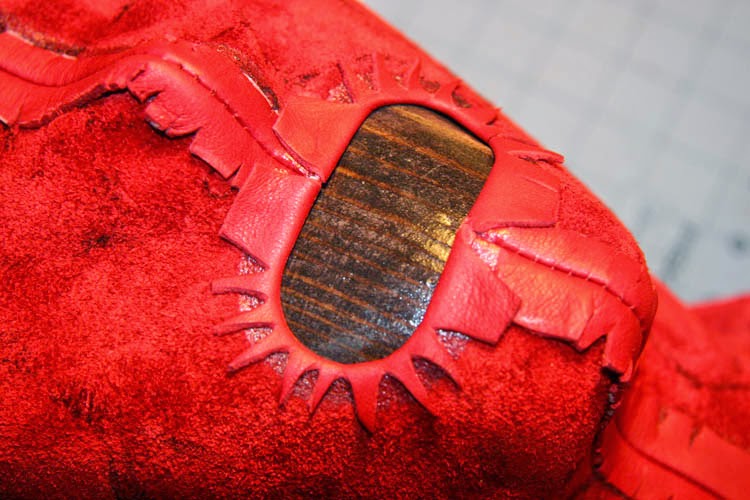
Once I’m happy with the shape of the mouth, the front seam is topstitched. Can you see the path I took around the mouth? I think having no crossover of the center seam kind of gives the mouth a cleaner look.

With the front of the hood complete (you can see I punched holes and set grommets for the nose), it’s time to join the front of the hood to the back.
Use clips to hold the front to back, aligning on the center seam.

Once sewn, it’s on to the wood head form for the glue-up of the center seam.

I find it’s easier to glue neatly on the form, and the hood is held in tightly in place with painter’s tape. I also have been gluing first, and cutting the small darts after the glue has set up. Makes for a neater glue job…

Once set up, the seam is flattened…

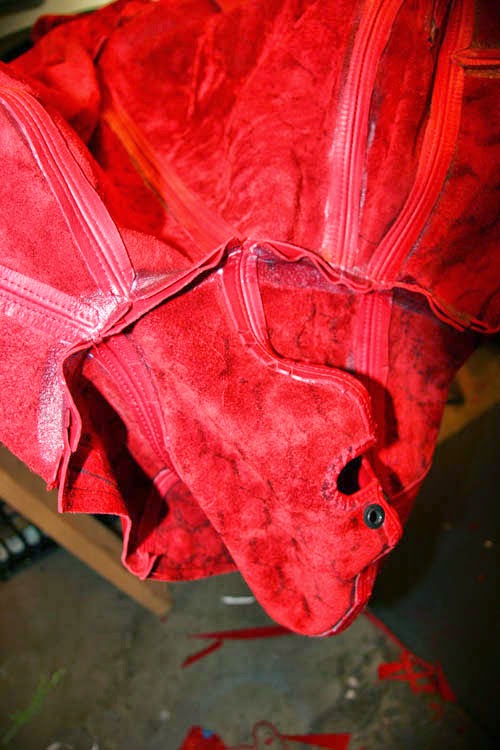
I like to leave the hood on the form overnight to stretch it out a bit…

The next day, we have a hood ready to attach to the sleepsack body.

Working inside-out, we align the hood on the center seam.

This is probably the most nerve-wracking to sew, as the different shapes coming together present a challenge. And it’s a highly visible connection where the hood meets the body.

It has to be perfect, and at this stage any screw-up has the potential to ruin both the body and the hood. No margin for error, really…
Fortunately, it turned out okay…

Once it’s topstitched, everything got a little brighter for me. Just stunning… And we’re almost there.
How To: Make A Boot Binder Sleepsack – PART I
These posts will cover every step of my process for making the boot-binder sleepsack. Let’s get started…

First, cut out all your parts (I use L+R as shorthand Left and Right):
L+R front panels
L+R Rear panels
L+R Shoulders
L+R Foot pocket side
Foot pocket bottom
High Heel pocket cap
L+R internal sleeves
Long Tongue (for rear zipper)
Short tongue (for front-access zipper)
Hood L+R front panels
Hood L+R rear top panels
Hood L+R bottom panels

Clip and sew darts on L+R shoulders and L+R rear panels.
 |
| Clipped. |
 |
| Sewn. |
 |
| Glued. |
…flatten (and topstitch if you like).
 |
| And flattened. |
And done:
 |
| Ready for the next step… |
Next, clip and sew L+R front panels together leaving opening for zipper (align at neck opening).


Remember to leave an opening for the zipper (it’s all too easy to just keep sewing)! Follow marks indicated on the pattern.
Glue and flatten entire front seam (including the part where the zipper will go).

Flattened seam from the front:

Keep that transition smooth around the zipper opening.

From the inside: use double-sided tape to hold the zipper in position for sewing.

Use another strip to hold the tongue in place.

Topstitch the front seam through the zipper and tongue. Just remember to fold back the tongue when sewing the second side, otherwise you’ll sew it completely shut. That would be a problem…

Using the tape and sewing both the zipper and tongue at the same time gives the front seam a very clean look: Very nice…
Next up: the foot pocket. We begin with the L+R foot pocket side panels.

These are clipped and sewn at the front seam, flattened and topstitched.

Clip and sew foot pocket to the L+R front panels, aligned on the center seam.

Sew it up…

…glue,
…flatten,

(a view of the inside)
…and topstitch.

This part of the binder is so cool looking… Love the foot pocket!

Next, we’ll clip and sew the Left + Right rear panels to the L + R front panels.
I start aligning at the shoulders and work carefully along the way to make sure things line up.

When aligning long pieces of stretchy material like leather, it’s easy for things to not align. You want to take you time to ensure symmetry between the two sides.

Sew those sides to the front panels once you’re happy with the clips.
Glue…
(lots of glue on these side seams…)
…flatten and topstitch. The foot pocket now looks like this:

Next up: the shoulders. Remember these from step 1?

Clip those puppies in place. Just like the side seams, the shoulders can be tricky to clip, but for a different reason: in this case you are attaching a curved shape (the shoulder) to a flatter shape (the body of the binder), so you are mating two different things together. Take your time to get things aligned just right before sewing.

You know the drill: glue, flatten and topstich the shoulders.

As you can see, I use a couple of boards clamped to my workbench to hold the piece while the glue dries.

It can just hang out for a few minutes while the glue sets up.

Once flattened and sewn, we have the neck hole coming together.

I topstitched this seam as well, although you don’t have to if you want a cleaner look. On this sack, I’m using matching red thread, so it’s a very neat and subtle look. Very pretty with this leather.

Now it’s time to close up the bottom of the foot pocket. The piece gets clipped and sewn, aligning on the front center seam.
Once sewn, you end up with this:
Next, we’re going to sew a couple of inches of the part that will become the heel pocket.

Once that’s done, the heel pocket end gets clipped in place.
This little piece is actually the hardest part of the whole thing to sew.

It’s a little tube that has to be capped just right, a tiny little piece.

I end up putting some foam in the pocket to help it hold its shape while I’m running it through the machine.

That’s it for part one. Next up: making the hood!
Incredible Japanese bondage by THL
Huge thanks goes out to my friend sammy for turning me on to THL, a photographer doing some jaw-droppingly, mind-bending, flat-out beautiful work… If you are a fan of Asian cuties tied very well (and lit well, and photographed beautifully) and in fetish-y garb, STOP NOW and go check out his site (or his tumblr) this instant. Come back and thank me later.
Here are just a few of the many (oh so many!) images that will have you drooling (you’re welcome!):

Every one of his images is so good it makes me want to cry. The girls he shoots are so pretty! How does he get such wholesome-looking Japanese (I’m assuming) girl-next-door types to endure such kinky torments? “Would you like to play dress-up in head-to-toe rubber and ballet boots with a gas-mask my dear?” Of course they say, only too happy to oblige in THL’s amazing life.

I take photos myself, so I appreciate all the work that goes into getting an image like this:

The rigging, the lighting, the location-shooting. My question is “How does he get so many beautiful shots, each so unique and different?” He’ll do an entire setup, in a particular location, with a beautiful model, and then he is posting just a single, solitary shot. Damn!

Obviously, this guy THL has an amazing eye, and a beautiful, willing lovely girl(s) to model for him. But man, what a way with the lighting and setups… One beautiful image after another.

Even the straightforward shots of his fetish gear are pure artistry…

Hysterical Literature by Clayton Cubitt

Another movie I had to share (otherwise I couldn’t call myself a friend) found courtesy of Huffington Post: a series of videos of women reading stories while being *ahem* (silently) stimulated until they reach a (literary?) climax. I think it’s an art project. Is it just me, or is this far sexier than any porn movie ever made? Doesn’t hurt that Theresa is completely stunning and gorgeous. Of course, I like weird stuff, so maybe it’s just that… Enjoy!
The Journey by Monica Menez
Came across a short film by fashion photographer Monica Menez that prominently features the female lead wearing those (oh-so-lovely) tall Gucci python boots from the current fall season. I just had to share this for all my fellow boot-lovers out there…
 |
| A still from the movie. Yes, every boot fetishist hopes to see this whenever a car door opens… |
The Journey from MONICA MENEZ on Vimeo.
The actress does a pretty amazing job of making the skyscraper heels seem almost manageable. Bravo to her!
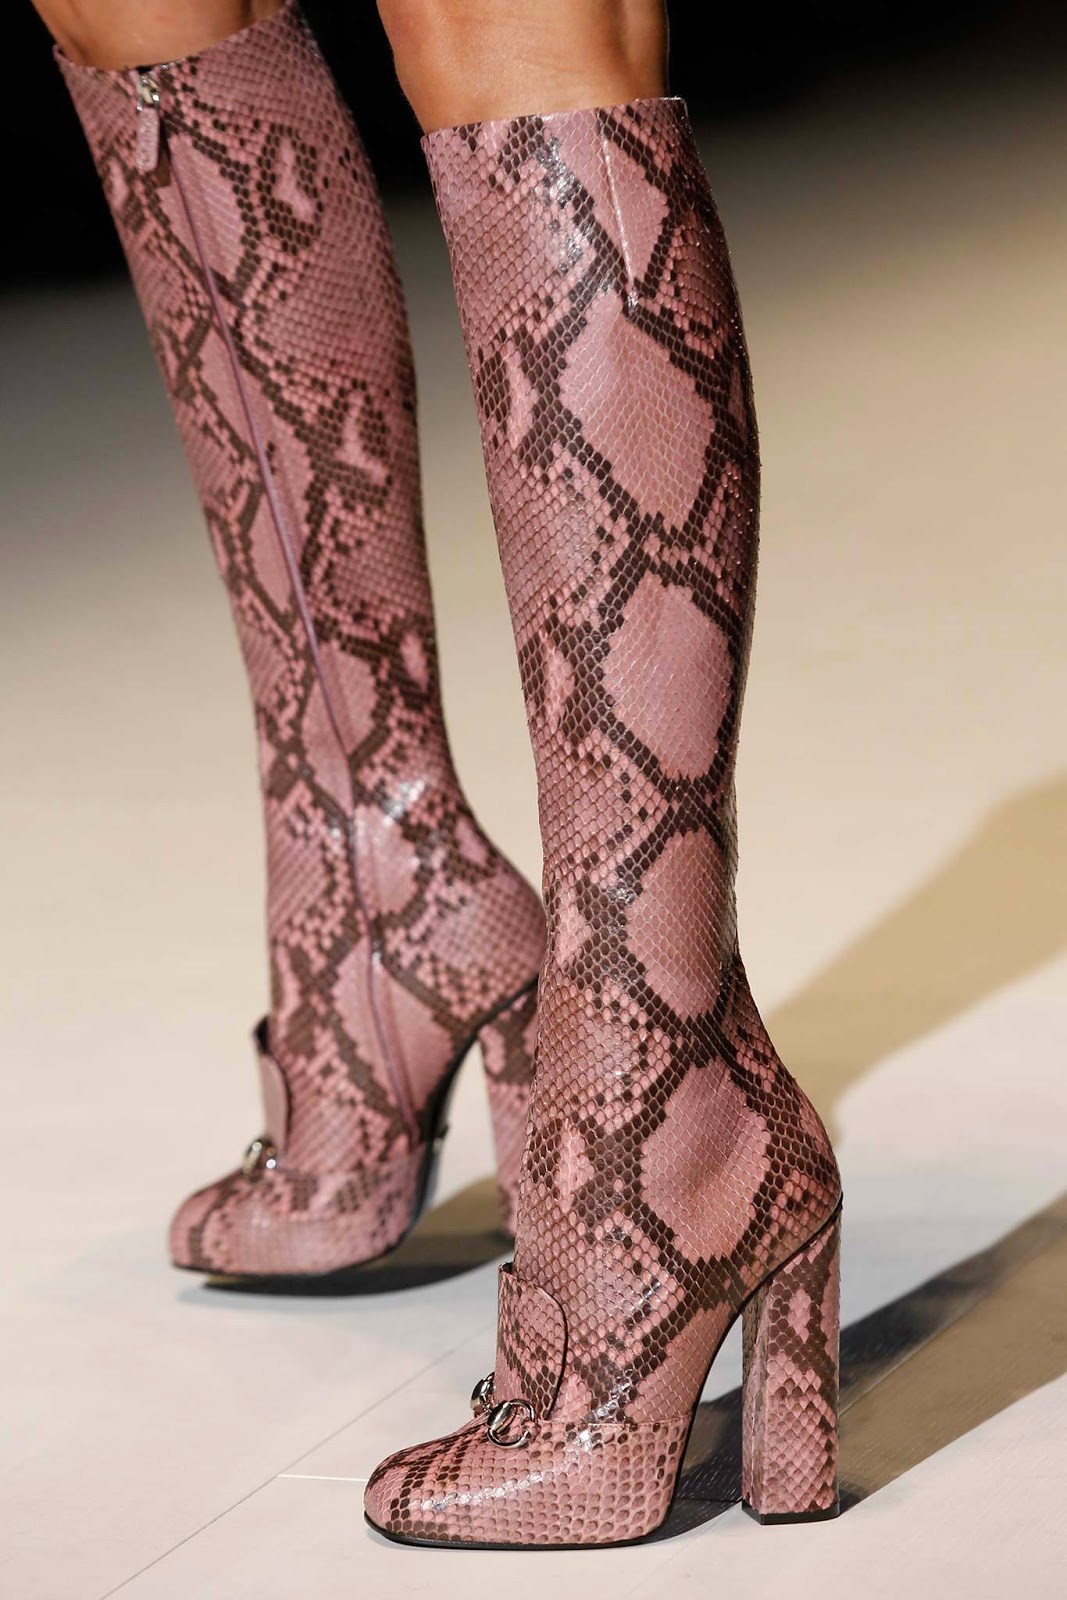 |
| Straight off the runway… |
Thanks to my friends over at Trendland, for the link to this visual treat.
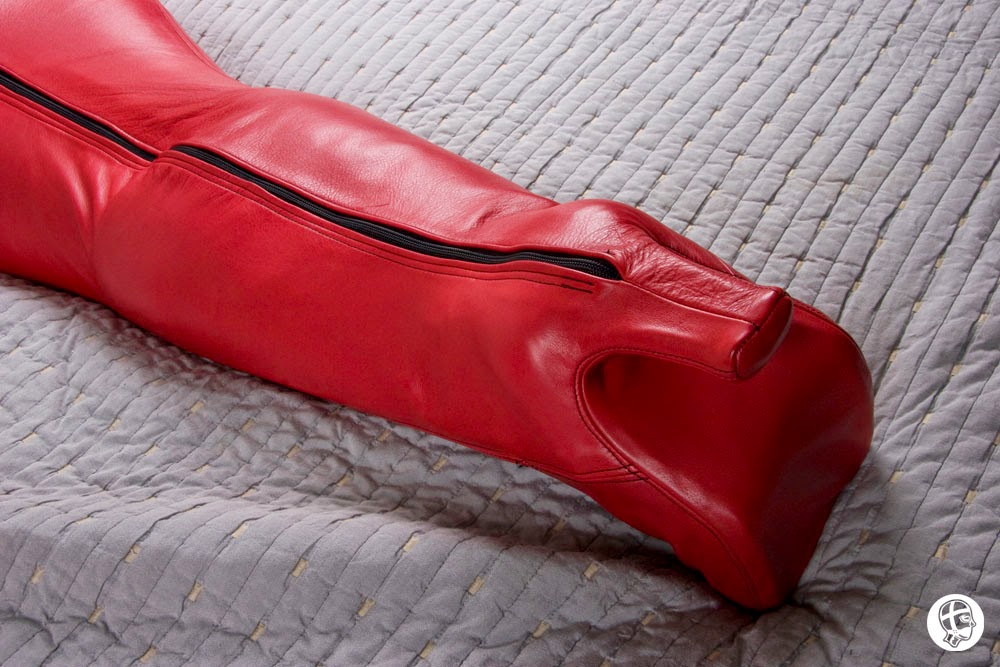
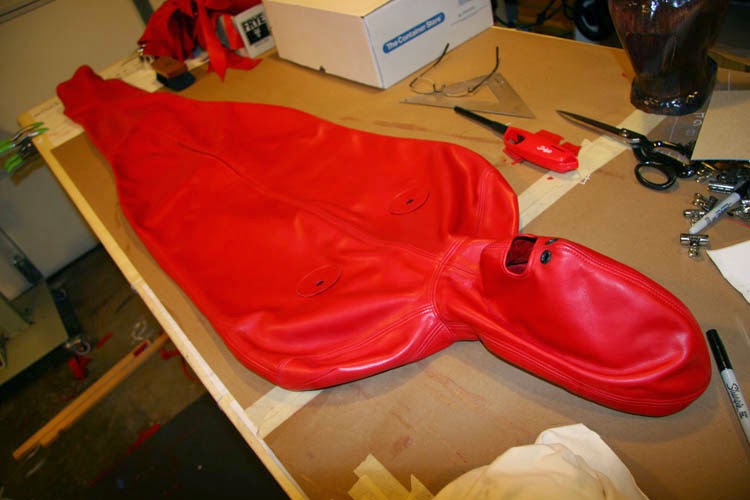
Red Boot Binder Sleepsack: The Final Cut
This is the final boot-binder sleepsack, made in the same leather as the first (a stunning, red, lamb-tan cowhide), but with some minor differences and refinements.
 |
| This sack features an open mouth and nipple access, with the neck pattern slightly shortened in front. |
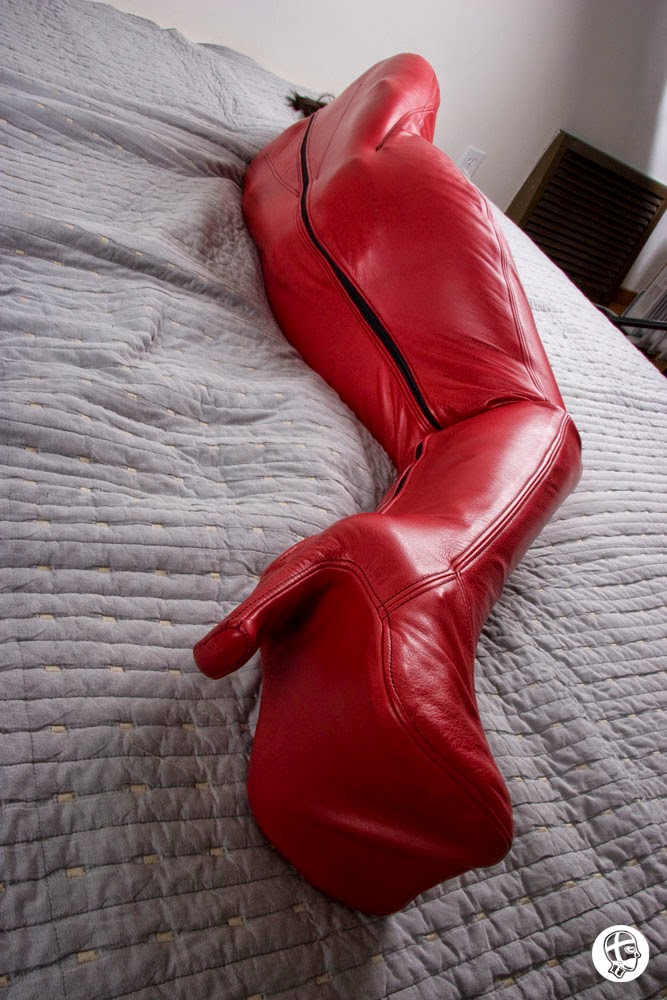
 |
| I went with red thread topstitching throughout (instead of black) for a cleaner look. |
 |
| The 3 sliders on the rear zipper make it possible to open the zipper anywhere along its length. |
 |
| And a few other tweaks to the pattern for the ultimate tight fit… |
Overall I’m pretty happy with how this project turned out. It’s been a long journey from initial sketch to the final product, but I’m glad to have this restraint brought from the realm of fantasy into reality. Thanks to everyone who has sent messages of encouragement and support along the way, both here and on fetlife. I do appreciate it!
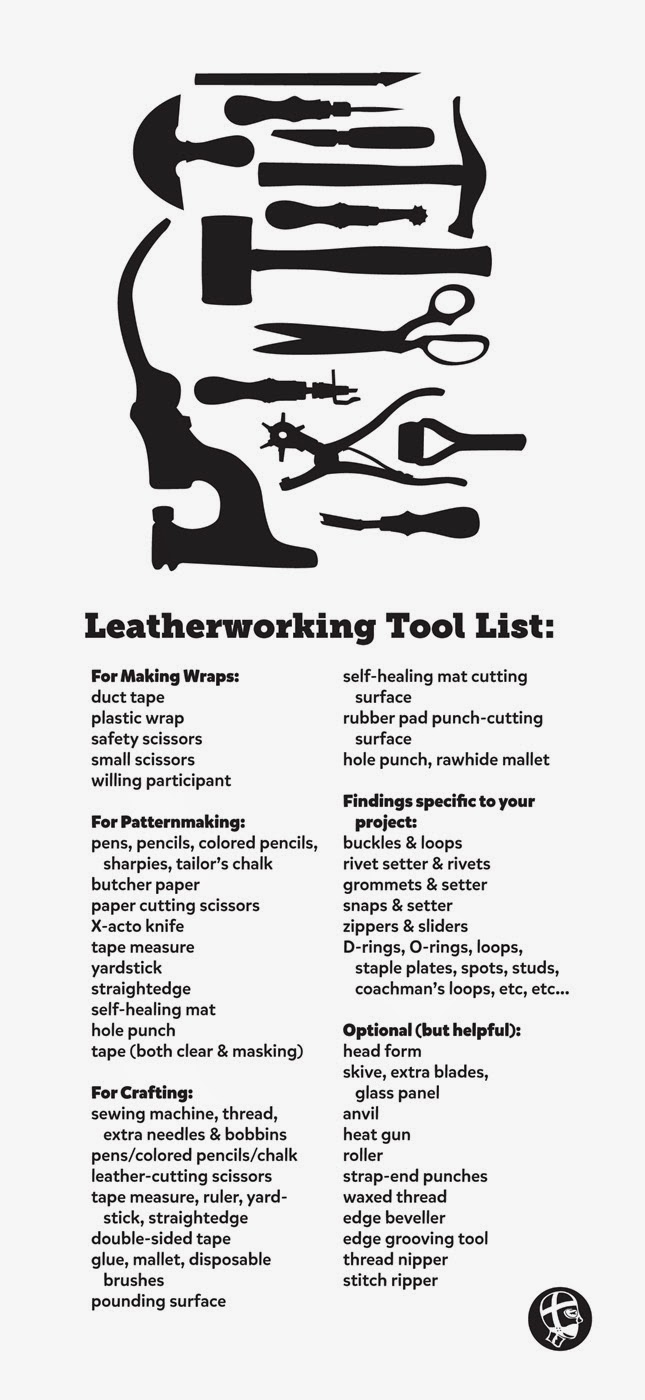
Leatherworking Tool List
For those of you who have asked about the tools I use most often, I put together the following list. It covers about 95% of what I need to do most leather sewing projects…
Boot Binder Sleepsack – The Pretty Shots